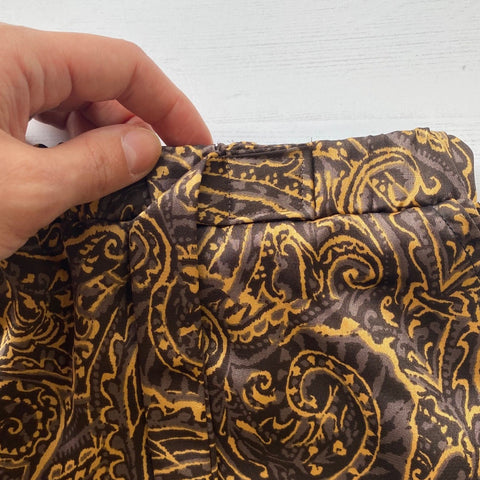
Free waist-tie hack for the Wide Leg Trousers!
How to make a waist-tie for the Wide Leg Trousers
What you'll need -
Wide leg trousers
Pattern - find it HERE
Fabric
Sewing machine
Pins
Safety pins
Tape measure
Cutting out
To start, cut the fabric for your ties. You can use your waistband pattern piece from the Wide Leg Trousers pattern. Simply cut two strips on the fold but fold back the length of the pattern piece to 16.5". Making each strip 33" x 3.25".

Step 1. Is to pop a safety pin onto the right side of the ties.

Step 2. Fold each of the ties in half length ways with the long raw edges touching. Stitch down the long edge and also the short edge with the safety pin, ensuring the safety pin is out of the way of the machine needle when stitching. Leave the other short edge unstitched.


Step 3. Turn the ties through the unstitched short edge, using the safety pin to pull the fabric through, so the tie is right sides facing out. Then give both ties a press.


Step 4. Time to pop your ties in place on your trousers! Take your tape measure and measure the distance between the centre front seam and the side seam (behind the pocket opening). Then pop a pin in the waistband at the half-way point of that measurement. Do this for each left and right leg. For example, our trouser's measurement from the centre front seam to the side seam is 9". The half-way point is 4.5". So we popped a pin at that point for each leg.
Top tip - ensure the gathers of your elasticated waistband are as even as possible at this point, as you'll be stitching your ties into place onto the waistband for the next step.


Step 5. Take one of your ties and pin the short raw edge where one of the pins on your waistband is. Stitch to hold in place, ensuring you do a forwards and backwards lock-in stitch at the beginning and end of your sewing.


Step 6. Next, take your tape measure and measure along 1" from your line of stitching, pop a pin in place to hold your tie onto your waistband. Sew a line of stitching where your pin maker is, parallel to your first line of stitching.


Step 7. Now, fold back your tie (towards the centre front seam of your trousers) so it is covering the short raw edge that you first stitched. Sew a rectangle to cover the raw edge and anchor the tie into place.


Step 8. Repeat these steps to sew the second tie onto the other side of your trouser's waistband.


Step 9. Tie your bow and you are finished! Hope you get to make many more pairs of these lovely trousers.

Find our trouser pattern here - https://www.owlandsewingcat.com/products/wide-leg-trousers-pattern-sizes-10-28
